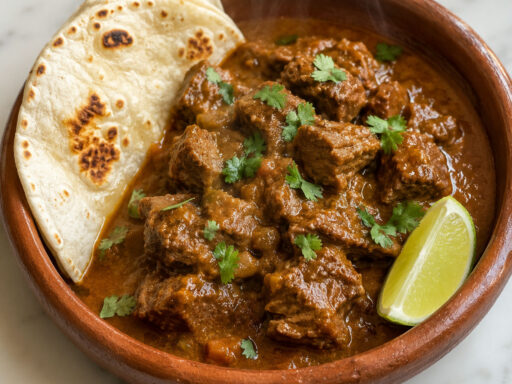
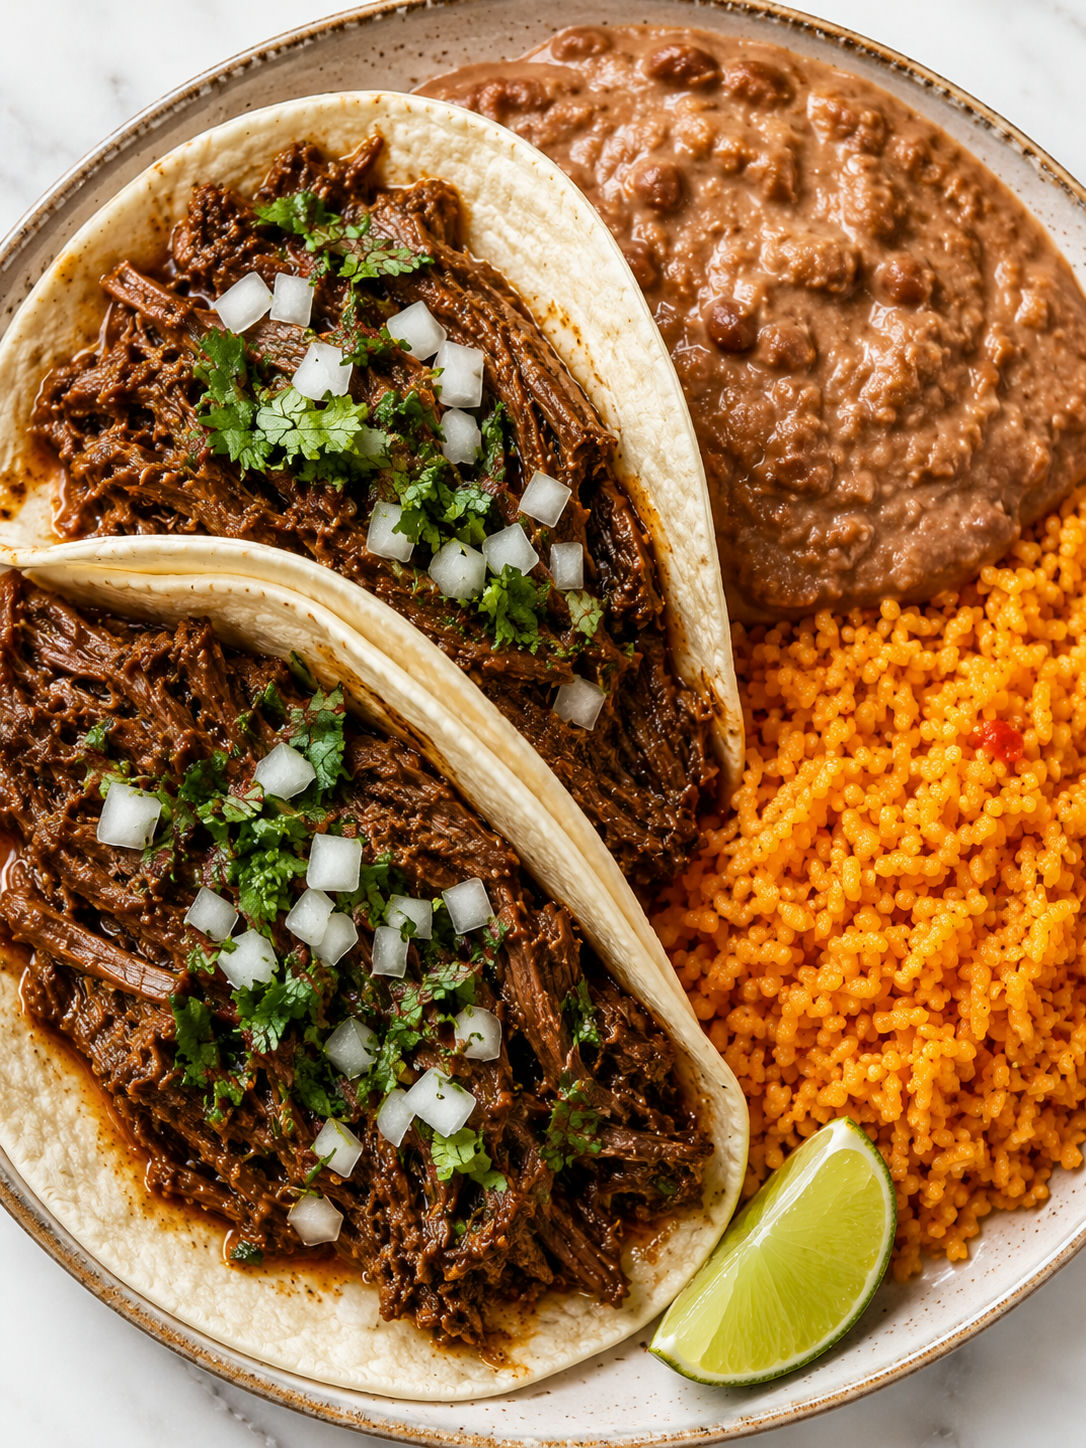
This is the kind of meal that fills the house with a smell that stops everyone mid-sentence. A chuck roast goes into the pot in the morning and by dinnertime it’s falling apart, rich with cumin and chili, ready to pile into soft tortillas you rolled out yourself.
The whole plate, tacos plus beans plus rice, is what a Mexican-American Sunday dinner looks like at its best. It takes a few hours but the stove and oven do most of the work. What you get out of it is a table full of people who actually put their phones down.
If you have never made flour tortillas from scratch, this is a good recipe to start with. They are simpler than they look and the difference is immediate the first time you taste one warm off the pan.
What Goes Into the Full Plate
Four components, each simple on its own. The chuck roast takes the most time but the least attention. Buy a 3 to 3.5 pound roast with good marbling; that fat is what makes the meat pull apart later instead of dry out.
- Chuck roast. The cut with enough connective tissue and fat to turn silky during a long braise. A lean roast will not shred the same way.
- Cumin, chili powder, and dried oregano. The three spices that give the braising liquid its backbone. Mexican oregano is more pungent than Italian; use a little less if that is all you have.
- Low-sodium beef broth. The braising liquid. Low-sodium lets you control the salt as the liquid reduces and concentrates.
- All-purpose flour and lard. The short ingredient list for the tortillas. The lard (or shortening) is what keeps them soft and slightly chewy instead of cracker-crisp.
- Pinto beans. Dried or canned both work. Cooking dried beans from scratch and using their broth for mashing gives a deeper flavor. Canned gets you there on a weeknight.
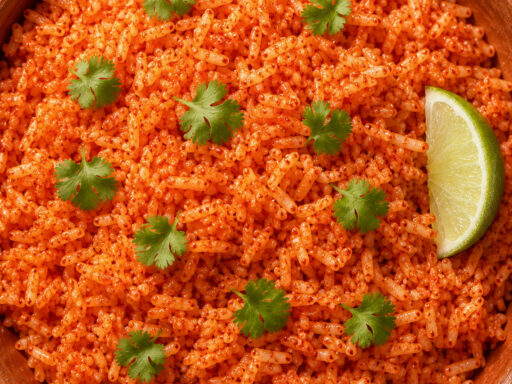
- Long-grain white rice. Toasted in oil before any liquid goes in. That toasting step is what gives Mexican rice its golden color and a faint nutty flavor you cannot get any other way.
- White onion and garlic. Used across three of the four components. Buy plenty and prep it all at once.
Building the Plate Step by Step
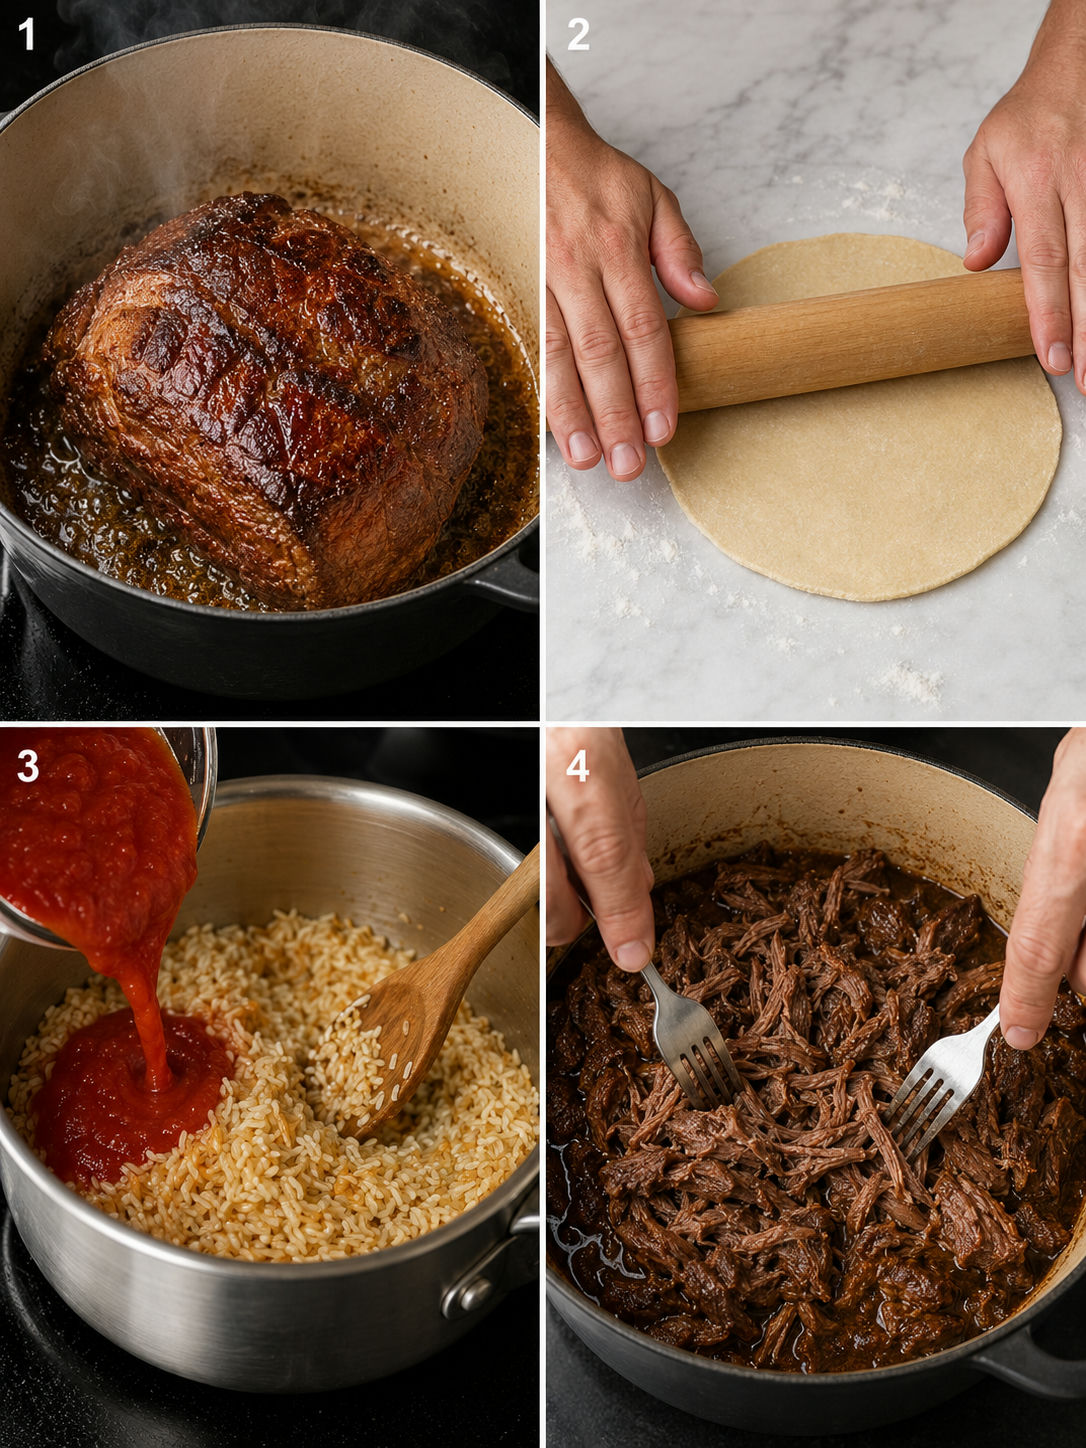
- Sear the roast. Pat the chuck dry with paper towels and season all over with salt, pepper, cumin, and chili powder. Heat a thin film of oil in a Dutch oven over medium-high and sear the roast for 3 to 4 minutes per side until deeply browned on all surfaces. Do not rush this; the crust is where a lot of the flavor starts.
- Build the braise. Remove the roast and sauté the diced onion in the same pot until soft, about 5 minutes. Add the garlic, oregano, and a bay leaf, cook for 1 minute more. Pour in the beef broth and scrape up any browned bits from the bottom. Nestle the roast back in, cover tightly, and cook at 300°F for 3 to 4 hours until the meat pulls apart easily with two forks.
- Mix the tortilla dough. While the roast braises, combine flour, baking powder, and salt in a bowl. Cut in the lard with your fingertips until the mixture looks like coarse crumbs. Add warm water a little at a time and mix until a soft, non-sticky dough forms. Divide into 12 balls, cover with a damp towel, and rest for 15 minutes.
- Toast and simmer the rice. Heat oil in a saucepan over medium. Add the dry rice and stir for 4 to 5 minutes until each grain turns golden. Add onion and garlic, cook for 1 minute, then stir in tomato sauce. Pour in hot broth, add salt and a pinch of cumin, and bring to a boil. Reduce to the lowest heat, cover tightly, and cook for 20 minutes without lifting the lid. Rest 5 minutes off heat before fluffing.
- Mash the refried beans. Heat lard in a heavy skillet over medium. Add garlic and cook for 30 seconds until fragrant. Add the beans and a few tablespoons of bean broth. Mash with a fork or potato masher while stirring, adding more broth a spoonful at a time to reach a thick, creamy consistency. Season with salt.
- Cook the tortillas. Heat a dry cast-iron skillet or comal over medium-high. Roll each dough ball into a thin round roughly 8 inches across. Cook for 30 to 45 seconds until small brown spots appear and the tortilla puffs slightly, then flip and cook another 30 seconds. Stack them in a clean towel as they come off the pan.
- Shred and serve. Remove the roast and pull the meat apart with two forks. Discard the bay leaf. Stir the shredded beef back into its braising juices. Taste for salt and add a squeeze of lime if you like. Serve in warm tortillas with beans and rice alongside.
Getting the Braise Right
The single thing that separates great braised chuck from dry, stringy beef is time at low temperature. The collagen in the cut needs sustained heat to convert to gelatin, and when it does, the whole piece becomes tender and the braising liquid turns silky. At 300°F with the lid on tight, 3 hours usually does it for a 3-pound roast. Four hours will not hurt it at all.
You want a bare simmer inside that pot, not a boil. A hard rolling boil toughens meat fibers and drives out moisture. Check it once at the 2.5-hour mark; if the liquid is bubbling aggressively, drop the oven to 275°F. The USDA notes that beef is safe at 145°F internal temperature, but for a braised chuck you are aiming for somewhere closer to 200 to 205°F before it truly shreds. See the USDA beef safety guide for full temperature reference.
Why Homemade Tortillas Are Worth It
Store-bought tortillas are convenient. Homemade ones are a different food. The texture is soft and slightly chewy at the same time, and there is a faint richness from the lard that packaged tortillas do not have. They also hold up better when you fold them around a wet filling like braised beef.
A few things matter most. Warm water (not hot, just warm from the tap) helps the gluten relax so the dough is easy to roll. Resting the dough balls for a full 15 minutes before rolling is not optional; skip it and the dough springs back. Roll them thin enough that they look slightly translucent. Cook on a properly hot pan so you see brown spots in under a minute. A lukewarm pan produces a pale, doughy tortilla. For a deeper look at every variable, this homemade flour tortilla guide covers all the details.
Refried Beans That Actually Taste Right
Refried beans do not actually need to be fried twice. The name comes from a Spanish translation issue with the word “refritos.” What matters is fat, a hot pan, and patience while mashing.
Start the beans in a hot skillet with melted lard and mash as you go. Add bean broth a tablespoon at a time to control the texture. Too thick and they clump on the tortilla; too thin and they slide off. Aim for something between hummus and loose mashed potatoes. A thin smear of refried beans on the inside of the tortilla before adding the chuck is one of those moves that sounds minor but holds the whole taco together. If you want to use the same beans as a base for a bigger Mexican spread, these homemade tostadas with refried beans use the same recipe and work perfectly alongside the tacos.
Make-Ahead Strategy for This Plate
The chuck roast is best made a day ahead. It reheats better than almost any other cut because the fat and gelatin in the braising liquid prevent it from drying out. Braise it the day before, let it cool in the liquid, and refrigerate overnight. The fat solidifies on top and lifts off cleanly before you reheat. The flavor also deepens overnight.
The rice is best made fresh. It dries out when refrigerated and reheats unevenly. Start the rice about 30 minutes before you plan to eat. The tortillas can be made a few hours ahead and kept wrapped in foil; warm each one in a dry skillet for 20 seconds per side just before serving.
If you enjoy this style of slow-cooked Mexican plate, slow-simmered chili verde with Spanish rice uses a similar braise approach and is a natural one to rotate in alongside this chuck roast plate.
Serving This Plate at the Table
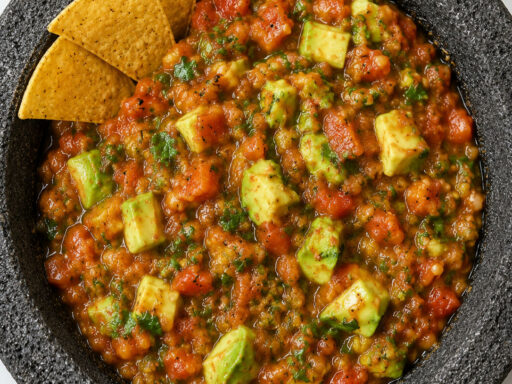
Set out bowls of diced white onion, chopped fresh cilantro, and lime wedges. Sliced radishes and a simple salsa round it out. Keep the tortillas wrapped and warm so people can build their own tacos. The beans go in a small bowl with a spoon; the rice fills out the plate.
This setup also works well when you are cooking for a larger group. Carne asada street tacos use the same flour tortillas and condiments, so they are easy to add to the spread as a second protein. The chuck tacos are the low-and-slow comfort anchor; the carne asada brings the char and smoke.
FAQs
- What cut of beef works best for chuck roast tacos?
-
Chuck roast is the right call. It has enough fat and connective tissue to break down during a long braise and turn genuinely tender. Brisket works too and gives a slightly firmer texture. Avoid lean cuts like eye of round or sirloin; they dry out instead of shredding.
- Can I make the braised chuck roast in a slow cooker?
-
Yes. Sear the roast on the stovetop first for better color and flavor, then transfer it to a slow cooker with the sautéed onion, garlic, spices, and broth. Cook on low for 8 hours or on high for 5 hours. The meat will be just as tender and the hands-off time is even longer, which is useful if you are out for the day.
- Can I substitute the lard in the flour tortillas?
-
Vegetable shortening gives a nearly identical texture. Softened butter also works and adds a richer flavor, though the tortillas are slightly less pliable once they cool. Avoid liquid oils because the dough will not come together properly and the tortillas will be stiff rather than soft.
- How do I store leftover braised chuck roast?
-
Keep the shredded meat stored in its braising liquid in an airtight container in the fridge for up to 4 days. The liquid prevents it from drying out when you reheat. Warm it gently in a covered skillet with a splash of the saved liquid over low heat. It also freezes well for up to 3 months.
- Can I use canned pinto beans for the refried beans?
-
Yes, and it is what most home cooks use on a busy night. Two 15-ounce cans of pinto beans, drained with a little of the liquid reserved, works exactly the same way. The flavor is a touch lighter than cooking dried beans from scratch, but once you mash them in lard with garlic the texture and richness are the same.
- How do I keep the flour tortillas soft and warm at the table?
-
Stack them as they come off the pan and wrap the stack in a clean kitchen towel or a folded piece of foil. The steam from the stack keeps them pliable. You can also keep the wrapped stack in a low oven at 200°F for up to 30 minutes. Left uncovered, they dry out and crack quickly.
References
Sources cited in this recipe.