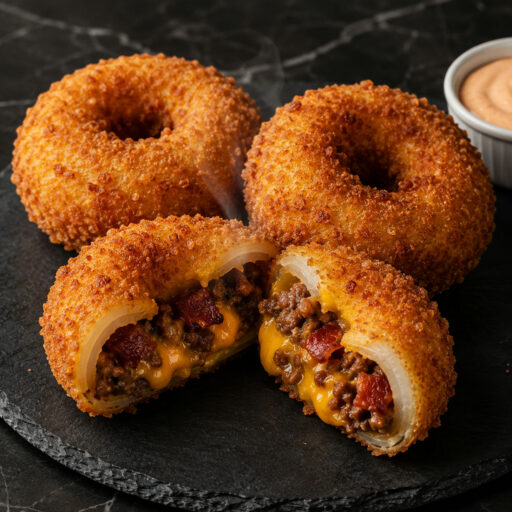
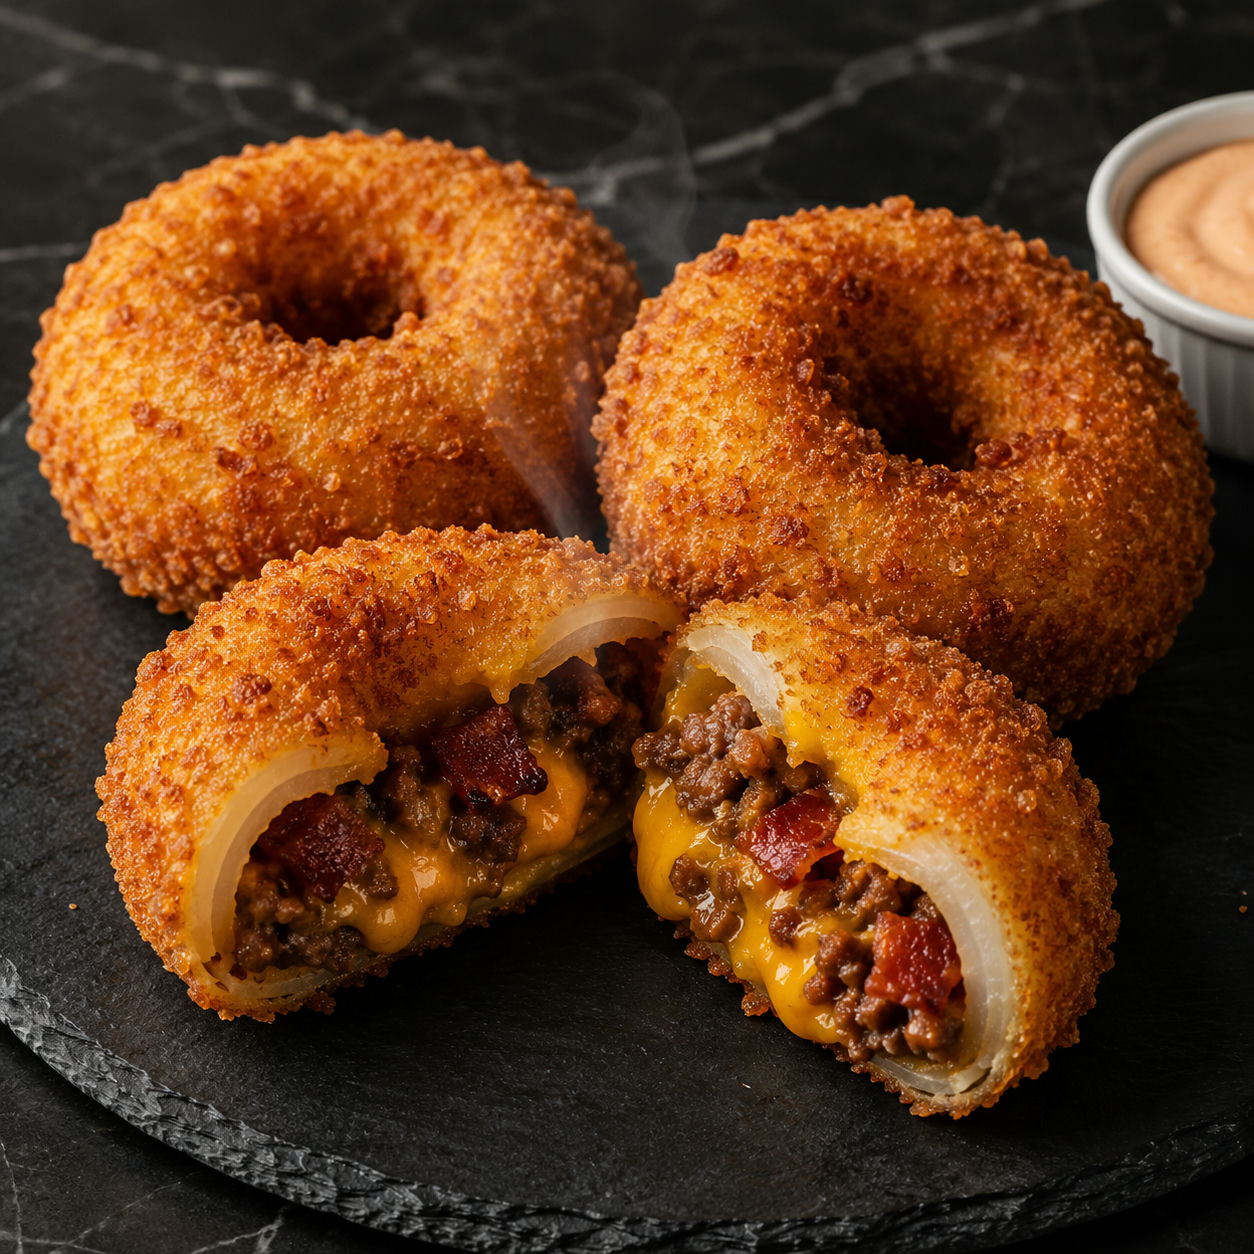

Onion rings are already hard to stop eating. Fill them with seasoned beef, bacon, and melted cheddar and they become something else entirely. I made a batch for a football watch party and they were gone well before halftime.
The concept is simple. Two thick onion rings pressed together create a sealed cylinder that holds the filling in place while it fries. The outside shatters. The inside is hot, cheesy, and meaty. It hits everything you want from a cheeseburger in one crispy bite.
You need large onions, ground beef, bacon, cheddar, and a standard breading station. The technique takes a bit of care the first time around and gets genuinely fast after that.
What goes into the filling and batter
The ingredients split into two categories: the cheeseburger filling and the batter that holds everything together. Quality matters most in the beef and the cheese. An 80/20 ground beef has enough fat to stay juicy inside the ring even after frying. Panko gives the exterior a proper crunch instead of a dense coating.
- Ground beef (80/20). The fat content keeps the filling moist and flavorful. Leaner beef turns dry and crumbly inside the breading.
- Bacon. Cooked until crispy and crumbled so it blends evenly into the filling without sliding out when you bite in.
- Sharp cheddar cheese. Freshly shredded from the block for the best melt. It fuses the beef and bacon into a cohesive layer that holds together.
- Large sweet onions. Vidalia or a similar variety, cut 3/4 to 1 inch thick so the rings are sturdy enough to contain the filling through frying.
- All-purpose flour. The first layer of the breading station. It gives the egg wash something to grip.
- Eggs. The binder between the flour coat and the panko outer crust.
- Panko breadcrumbs. These larger, airier crumbs fry up crunchier than standard breadcrumbs and stay crispier for longer after draining.
- Smoked paprika and garlic powder. Season both the beef mixture and the batter so every layer of every bite tastes like something distinct.
Building and frying the rings
- Cook the bacon and beef. Fry the bacon until crispy, drain on paper towels, and crumble into small pieces. In the same skillet over medium-high heat, brown the ground beef with garlic powder, onion powder, smoked paprika, salt, and pepper. Break it into fine crumbles as it cooks. Drain the fat and let the meat cool for 5 minutes.
- Mix the filling. Combine the cooked beef, crumbled bacon, and shredded cheddar in a bowl. Stir until the cheese begins to melt into the warm beef. Let the mixture cool until it holds together when pressed. It should feel firm, not wet.
- Prep the onion rings. Slice the onions into 3/4-inch rounds and separate the layers into individual rings. Pair each large ring with a slightly smaller ring that sits snugly inside it. You are building two-ring sandwiches.
- Fill and seal. Stand a large ring on a flat surface. Pack the beef and cheese mixture firmly inside, pressing it down to the top edge. Set the smaller ring into the top of the filling and press it down firmly to seal. Place the filled rings on a parchment-lined tray and freeze for 10 to 15 minutes until firm.
- Set up the breading station. Three bowls: seasoned flour in the first, beaten eggs in the second, and panko mixed with smoked paprika, garlic powder, and salt in the third.
- Bread the stuffed rings. Dredge each chilled ring in flour, shaking off the excess. Dip in beaten egg, letting the extra drip off. Press firmly into the panko on all sides. For a thicker, crunchier crust, repeat the egg and panko step once more.
- Fry until golden. Heat 3 inches of vegetable oil in a deep heavy pot to 350°F (175°C). Fry 2 to 3 rings at a time for 3 to 4 minutes, turning once, until deep golden brown. Oil temperature is the key variable: too low and the rings go pale and greasy, too high and the crust burns before the filling heats through. Drain on a wire rack and serve right away.
The two-ring seal trick
The key to keeping the filling inside is using two rings pressed together, not one open ring. A single ring is open at the bottom and the filling has nowhere to go but down when it softens in hot oil. Two rings create a sealed cylinder. The inner ring, pressed over the top of the filling, holds everything in place and is the single technique step that makes these work reliably.
Chilling the assembled rings before breading is the other move that makes the difference. A cold, firm filling holds its shape through the flour, egg, and panko stages without squeezing out the sides. Ten minutes in the freezer is enough. The rings do not need to be frozen solid. Firm to the touch is all you need, and they will bread cleanly without fuss.
If you like the idea of other stuffed-ring formats, the jalapeño popper stuffed onion rings use the same two-ring technique with a spicy cream cheese base.
Why the beef goes in pre-cooked
Undercooked ground beef inside a sealed breaded shell is a real food safety issue. The 3 to 4 minute frying window heats the filling but is not long enough to fully cook raw beef at the center. Brown the meat completely in the skillet first. According to the USDA ground beef food safety guidelines, ground beef must reach an internal temperature of 160°F to be safe. A safe minimum cooking temperatures chart is a handy reference to keep near your stove.
Also drain the cooked beef thoroughly. Excess grease in the filling makes it hard for the cheese to bind and can cause the batter to separate from the ring during frying. If the meat still looks wet after draining, pat it with a paper towel.
Swaps and variations that work
Swap the ground beef for Italian sausage and the cheddar for mozzarella for a pizza-flavored ring. Add diced jalapeños and pepper jack for a spicier build. A small spoonful of cream cheese stirred into the beef mixture keeps the filling creamier and helps it stick together, which is useful if your cheese is not melting as well as you want.
For a lighter path, the rings bake well with a generous spray of oil at high heat. The crispy air fryer onion rings method gives a solid baseline for adapting the technique to the oven or air fryer. The texture is different but the flavor holds up.
If you are cooking for a crowd and want a second stuffed handheld on the table, the bacon cheeseburger bombs use the same beef and bacon filling wrapped in biscuit dough and feed a group just as fast.
Storing and reheating leftovers
Cool the rings completely before putting them away. Stack them in an airtight container lined with paper towels and refrigerate for up to 2 days. Reheat in a 375°F oven or air fryer for 6 to 8 minutes. The crust comes back surprisingly crisp using dry heat. The microwave works but the breading turns soft and a bit gummy. For anyone planning ahead for a party, the best move is to assemble, bread, and freeze the rings raw on a tray, then bag them and fry straight from frozen when you are ready. That gives far better results than freezing after frying.
FAQs
- Can I bake these instead of deep frying?
-
Yes, though the texture will be different. Place the breaded stuffed rings on a wire rack over a baking sheet, spray generously with cooking oil, and bake at 425°F (220°C) for 18 to 22 minutes, flipping once halfway. They come out crispier than you would expect, just not quite as shatter-crisp as the fried version. The crispy air fryer onion rings method also adapts well here if you want to go lighter on oil.
- What is the best cheese to use in the filling?
-
Sharp cheddar melts well and has enough flavor to hold its own against the beef and bacon. American cheese is another solid pick because it melts almost instantly and stays creamy. Pepper jack adds heat if you want it. Avoid pre-shredded bags when possible since the anti-caking coating slows melting. Shredding your own from a block makes a real difference here.
- How do I keep the filling from falling out during frying?
-
Two things help most. First, chill the assembled rings in the freezer for 10 to 15 minutes before breading. This firms the filling so it holds its shape through the dredging steps. Second, make sure the beef mixture is packed snugly and both rings are pressed firmly together with no visible gaps. The panko crust also acts as a seal once it sets in the hot oil.
- Can I make these ahead of time?
-
Yes. Assemble and bread the rings, then lay them on a parchment-lined tray and freeze until solid (about 1 hour). Transfer to a zip bag and freeze for up to 1 month. Fry straight from frozen at 350°F, adding about 2 extra minutes to the cook time. Do not thaw them first or the breading absorbs moisture and turns soft before it hits the oil.
- Can I substitute ground turkey for the beef?
-
Yes. Use 93% lean ground turkey and season more aggressively since turkey has a milder base flavor. Add a splash of Worcestershire sauce and extra smoked paprika to compensate. The filling will be slightly drier, so the cheese and bacon become even more important for richness. Cook turkey to 165°F rather than 160°F before using it in the rings.
- What dipping sauces go best with these rings?
-
Classic burger sauce (mayo, ketchup, mustard, and pickle relish) is the easiest and most natural choice. Ranch, chipotle mayo, and honey mustard all work well too. For a sharper contrast, a pickled jalapeño aioli cuts through the richness nicely. The ranch dipping sauce version has a detailed sauce recipe worth bookmarking.
- How do I store and reheat leftovers?
-
Cool the rings completely before putting them away. Keep them in an airtight container in the fridge for up to 2 days. Reheat in a 375°F oven or air fryer for 6 to 8 minutes until the crust is crispy again. The microwave works in a pinch but the breading softens. For the best results when planning ahead, freeze them before frying rather than after.
References
Sources cited in this recipe.